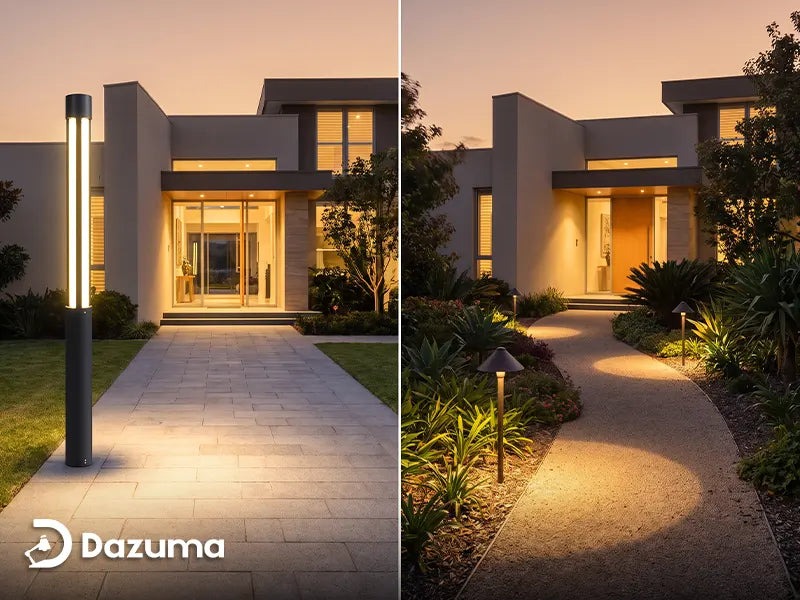
Outdoor lighting is one of the few home improvements that changes how a property looks, feels, and functions at the same time. A well-planned scheme can make steps easier to see, help guests find the entrance, extend the use of a patio, and reveal architectural or landscape features after sunset. Poorly planned lighting, however, often produces harsh glare, deep shadows, mismatched colors, and unnecessary brightness.
By starting with the way people move through the property, homeowners can create an exterior that feels comfortable and intentional while using fewer fixtures more effectively.
Begin With a Nighttime Walk-Through
Planning should begin after dark rather than in a brightly lit showroom. Walk from the street or driveway to the front door, then continue toward the garage, side gate, patio, and any regularly used garden areas. Note where level changes are difficult to see, where keys or house numbers are hard to read, and where existing lights shine directly into the eyes.
Separate genuine needs from decorative opportunities. A step, path intersection, or entrance needs dependable visibility. A tree, textured wall, or water feature may deserve accent lighting, but it does not need the same brightness.
Use Three Basic Layers
A balanced plan normally combines ambient, task, and accent lighting. Ambient light provides the general glow around a porch, terrace, or seating area. Task lighting supports a specific activity, such as unlocking a door, using an outdoor kitchen, or walking down steps. Accent lighting draws attention to selected architecture, planting, or materials.
These layers should overlap gently instead of competing. For example, wall lanterns may establish a welcoming entrance, low path lights may guide visitors toward it, and one narrow spotlight may emphasize a nearby tree. If a single floodlight is expected to perform all three jobs, it often becomes too bright near the fixture while leaving distant areas visually flat.
Choose Fixtures by Location and Purpose
Fixture style matters, but placement requirements should narrow the options first. Wall-mounted lights work well beside doors and along exterior walls. Bollards and low path fixtures can define walkways without flooding the entire garden. Post or pillar lights can mark gates and boundaries, while recessed well lights and directional spotlights can highlight vertical surfaces or mature trees.
Homeowners exploring a broad Outdoor Lighting range should compare beam direction, mounting method, dimensions, light source, and weather rating before focusing on finish. A fixture that looks attractive in a product image may still be wrong for a windy corner, a narrow walkway, or a low porch ceiling. The best choice solves the practical requirement and then complements the architecture.
Respect Weather Exposure
Exterior fixtures must cope with conditions that indoor lighting never encounters. Even a covered porch may experience condensation, humidity, dust, insects, temperature swings, and wind-driven moisture. Use fixtures specifically rated for the intended location, and distinguish between protected damp areas and positions exposed directly to rain or irrigation.
Construction details also influence durability. Examine the housing material, finish, seals, glass or diffuser, fasteners, cable entries, and method for replacing or servicing the light source. Coastal air, heavy snow, intense sun, and frequent storms may require more resistant materials or finishes.
Control Brightness and Glare
Outdoor lighting should help the eyes adapt to darkness, not imitate daylight across the entire yard. Excessively bright fixtures can make neighboring areas appear darker, cause discomfort, disturb views from inside, and spill light beyond the property. Shielded or downward-facing fittings generally provide better control than exposed bulbs.
Use the lowest practical brightness for each task and judge the result from normal eye level. Path lighting needs to reveal edges and obstacles; it does not need to illuminate every blade of grass. Entrance lighting should make faces, locks, and steps visible without shining directly at visitors. Accent lighting should reveal form and texture rather than turn a tree or wall into a glowing billboard.
Keep the Color of Light Consistent
Color temperature strongly affects atmosphere. Warm white light often makes brick, timber, stone, and planting look comfortable and natural, while neutral light may suit contemporary materials or functional work areas. The exact choice is less important than maintaining a deliberate relationship between nearby fixtures.
A porch with warm lanterns can look disconnected if the adjacent path uses noticeably blue light. Buy a small number of bulbs or test adjustable fixtures before committing to the entire project.
Add Controls That Match Daily Life
Controls can make a modest lighting plan more useful and efficient. Dusk-to-dawn sensors are convenient for lights that should operate throughout the evening. Motion sensors suit service areas and locations where light is needed only briefly. Timers and compatible smart controls can create schedules for entrances, patios, and decorative zones.
Group lights by purpose, label controls clearly, and include a manual override where appropriate. When browsing specialists such as Dazuma Lighting, compare not only fixture appearance but also bulb compatibility, dimming requirements, and control options.
Plan Wiring Before Improving the Landscape
Hardwired lighting requires early coordination. Decide fixture positions before laying a new patio, rebuilding steps, installing edging, or completing major planting. This helps avoid lifting finished surfaces later and allows cable routes, transformers, junction boxes, and switches to remain accessible for maintenance.
Low-voltage landscape systems may be suitable for many garden applications, but voltage does not remove the need for correct installation. Mains-voltage fixtures and new circuits should be handled by a qualified electrician in accordance with local electrical and building requirements.
Test the Plan in Stages
Outdoor lighting is easier to evaluate after dark than on a drawing. If possible, complete one zone first or temporarily position compatible low-voltage fixtures before final installation. Check the view from the street, neighboring properties, interior windows, and outdoor seating areas. Adjust angles and brightness before adding more lights.
This staged approach prevents overbuying and helps identify where existing ambient light already performs useful work. It also makes it easier to correct repeated spacing, uneven beams, or glare before the same problem appears across the entire property.
Maintain the Result
Even a good design loses effectiveness when lenses become dirty or plants grow across beams. Clean exterior fittings periodically, remove insects and debris, check seals, straighten shifted fixtures, and trim vegetation where necessary. After storms or seasonal changes, inspect exposed wiring, mounting points, and drainage around ground-level lights.
A successful outdoor lighting plan does not call attention to the number of fixtures installed. It makes movement feel natural, creates comfortable places to gather, and allows the home and garden to remain visually connected after sunset. By layering light, choosing products for their actual environment, and testing each zone carefully, homeowners can achieve a polished result without turning the property into an overlit stage.
